Roasted Chickpeas Recipe: 5 Best Secrets for a Crispy Protein Snack
- 09 May 2026
Quick Summary: The Perfect Crunch
- A successful roasted chickpeas recipe requires completely drying the beans before roasting.
- High-heat roasting (200°C/400°F) is essential for achieving a long-lasting crunch.
- Adding spices *after* roasting prevents them from burning and becoming bitter.
- Roasted chickpeas are an excellent plant-based source of protein and fiber for 2026 health goals.
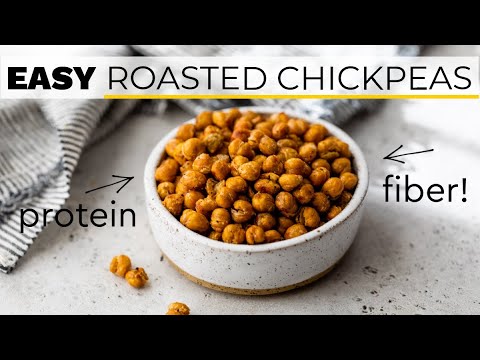
Finding a satisfying, crunchy snack that isn't loaded with empty calories is a constant challenge, but the roasted chickpeas recipe offers the perfect solution. In 2026, as more people move toward plant-based proteins, mastering the roasted chickpeas recipe has become a fundamental skill for healthy snacking. These little legumes are transformed in the oven into a savory, protein-packed alternative to potato chips. This guide will walk you through the professional techniques needed to ensure your chickpeas are perfectly crispy every single time.
The Nutritional Power of the Humble Chickpea
Before diving into the roasted chickpeas recipe, it is worth noting why this snack is a nutritional powerhouse. Chickpeas are rich in folate, iron, and phosphorus, making them an excellent fuel source for both the body and the brain. By using a roasted chickpeas recipe, you preserve these nutrients while creating a shelf-stable snack that you can take to work, the gym, or on a hike. This method of preparation is far superior to store-bought versions, which are often fried in inflammatory seed oils and coated in artificial flavorings.
Table of Contents:
- 1. The Importance of Drying Your Chickpeas
- 2. Temperature and Timing for Maximum Crunch
- 3. Choosing the Right Oil for High-Heat Roasting
- 4. Creative Seasoning Blends: Sweet and Savory
- 5. How to Store Your Chickpeas to Maintain Crispness
- Frequently Asked Questions
1. The Golden Rule: Dry Your Chickpeas Thoroughly
The most common failure in a roasted chickpeas recipe is a lack of crunch, and this is almost always caused by moisture. After rinsing your canned or cooked chickpeas, you must dry them meticulously. Use a clean kitchen towel to pat them dry, and if you have the time, let them air-dry for 30 minutes on a tray. Any remaining water will turn into steam in the oven, leading to a soft, mushy texture. A dry chickpea is a crispy chickpea, and this is the most important step in the entire roasted chickpeas recipe.
2. Roasting for Results: Finding the Sweet Spot
To achieve that signature snap in your roasted chickpeas recipe, you need the right temperature. Roasting at 200°C (400°F) for approximately 25 to 30 minutes is the ideal range. During this time, the internal moisture evaporates while the exterior browns. A pro tip for any roasted chickpeas recipe is to give the tray a good shake every 10 minutes to ensure even cooking. You’ll know they are ready when they sound like little pebbles when you shake the pan—that’s the sound of a successful roast.
3. The Role of Oil in High-Heat Cooking
In a roasted chickpeas recipe, oil serves two purposes: it helps the exterior crisp up and acts as a binder for your spices. However, you should use an oil with a high smoke point, such as avocado oil or extra virgin olive oil. Don't over-saturate them; a light coating is all you need. In 2026, we avoid refined vegetable oils that can oxidize at high temperatures. By choosing the right fat for your roasted chickpeas recipe, you maintain the health benefits of the snack while achieving the best possible texture.
4. Flavor Profiling: When and How to Season
A major secret to a great roasted chickpeas recipe is the timing of the seasoning. If you add spices like paprika or garlic powder at the beginning, they will likely burn in the high heat of the oven, leaving a bitter taste. Instead, roast the chickpeas with just oil and salt, then toss them with your favorite spice blends immediately after they come out of the oven while they are still hot. Whether you prefer a smoky BBQ blend, a spicy chili-lime, or even a cinnamon-sugar sweet version, this roasted chickpeas recipe technique ensures vibrant, fresh flavors.
5. Maintaining the Crunch: Proper Storage Tips
The final challenge of the roasted chickpeas recipe is keeping them crispy for more than an hour. Many people make the mistake of sealing them in an airtight container while they are still slightly warm, which traps steam and softens the chickpeas. For the best roasted chickpeas recipe results, let them cool completely on the tray. Once cool, store them in a jar with the lid slightly ajar or in a paper bag. This allows a small amount of air circulation, which helps maintain that satisfying crunch for several days.
FAQ: Perfecting the Roasted Chickpeas Recipe
Q: Should I peel the skins off the chickpeas?
A: It’s not necessary, but removing the loose skins can result in an even crispier roasted chickpeas recipe. After drying them with a towel, you’ll notice some skins come off naturally—just discard those before roasting.
Q: Can I use dried chickpeas instead of canned?
A: Yes, but you must soak and boil them first until they are tender. Once cooked, follow the same drying and roasting steps as you would for a canned roasted chickpeas recipe.
Q: Why did my chickpeas turn out chewy?
A: This is usually because they weren't dried enough or weren't roasted long enough. Every oven is different, so for your next roasted chickpeas recipe, try leaving them in for an extra 5 minutes or increasing the temperature slightly.
Q: Are roasted chickpeas a good pre-workout snack?
A: Absolutely! Because they are a complex carbohydrate with a good amount of protein, a roasted chickpeas recipe provides steady energy without the sugar crash associated with many processed bars.
For more healthy snacking inspiration, visit our Snacks section. To explore more ways to use legumes in your kitchen, read about the nutritional profile of chickpeas on Wikipedia.
Watch the full guide on how to make the ultimate crispy roasted chickpeas here: